Networking Basics - Certifications - Windows 7 - Windows 8 - Home Network Setup - Wireless Setup :: About - Contact - Search
How to Connect to a Printer in Windows XP
Let's connect to a printer since now you have a share printer. Click here for a tutorial on how to share a printer.
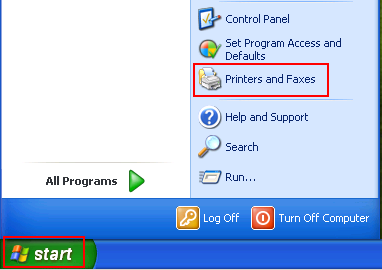
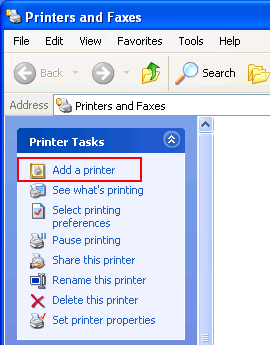
To connect to your printer on the network, follow this tutorial:
|
3.) The Add Printer Wizard opens, click Next. Then select A network printer, or a printer attached to another computer, and then click Next. |
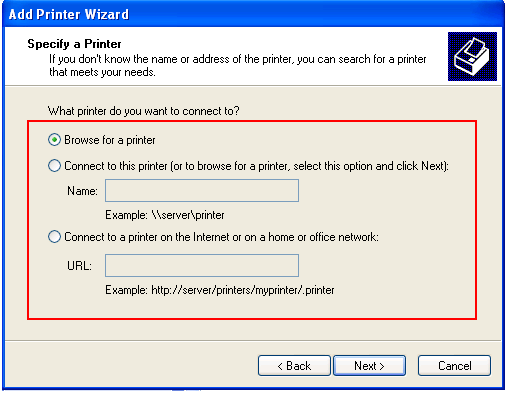
4.) Connect to the desired printer using one of the following three methods.
|
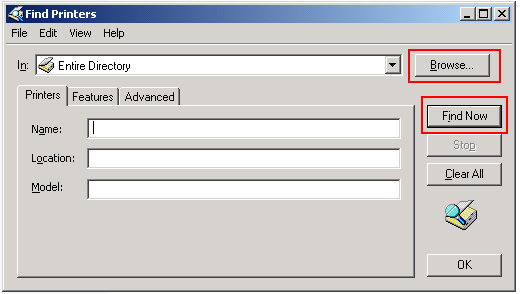
1.) Browse for a printer (Search for a printer in Active Directory) If you are logged on to a Windows domain that runs Active Directory then you can choose this method.
|
|
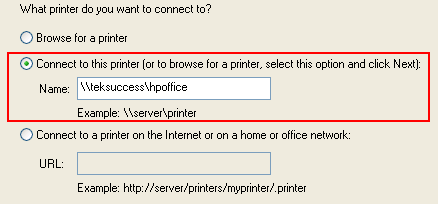
2.) Connect to this printer (Type the printer name or browse for it)
|
|
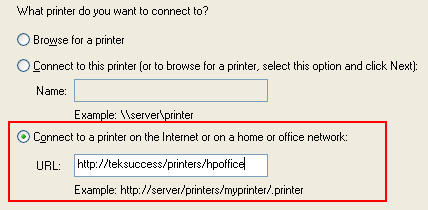
3.) The third method is pretty cool. It is Connect to the printer on the Internet or on a home or office network. Note: If you have permission to a printer, you can use the printer's URL to connect to it across the Internet. (Please check your printer's documentation if you can't connect to the printer through the Internet.)
|
Connecting to a shared printer is very helpful when you have a printer that only uses USB connection. This means the printer has no wireless antenna or Ethernet port. The USB only printer can connect to your computer and on your computer you would share it and then you can connect to it using the printer's share name like I showed you in this tutorial.
You can also quickly connect to a shared printer by typing the path in the run command window.
Go to Start and then click Run
Type the printer name in the run text box: \\printserver_name\share_name
Please also check this tutorial on how to share folders in Windows XP.
Return from Connect to a Printer to Windows XP Networking Tips
Return from Connect to a Printer to homepage of Computer Networking Success
"Didn't find what you were looking for? Use this search feature to find it."

1








New! Comments
Have your say about what you just read! Leave a comment in the box below.